I spent 2 weeks banging my head on the wall to get this to work. Dozens of youtube videos, forums, blog posts, 2 paid courses, and 10 remakes of my armature later – I found the answer.
Getting Unreal engine to accept your custom armature is like trying to impress a first date—no matter how much you prepare, something always goes wrong, the smallest details can crush you, and you’re left contemplating your life choices.
Here’s everything I learned the hard way so you don’t have to do what I did.
Hi, I’m Cody. I take dozens of long, confusing, and questionable tutorials and turn them into one sharp, clear, and useful golden nugget. Consider me your shortcut to clarity.
In this post we will be making a custom armature in blender, getting it all completely perfect for Unreal’s high and picky standards, exporting/importing and
quickly setting up IK for it to interact with stuff in the game.
Yes, I could of used the many tools out there like Send2UE, or GameRigTools. Fact is, sometimes you just need to make a custom armature. A creature that isn’t bipedal, something unique, with many strange joints and legs.
I also want to know how to do this from scratch, so I can not only know my craft, but be able to debug errors if anything goes wrong with a plugin. Also what if a plugin doesn’t work?
To make this post more digestible, I’ll cover the quirks in the first part. The second part will be the actual process with these quirks in mind. Skip to whatever section is easier for you to learn.
We will be covering all these quirks in practice in section 2, so don’t worry if some don’t make sense right now.
The Quirks of Blender & Unreal’s Relationship
- Preferably make your creature facing in the y axis. This isn’t necessary, but when you import into unreal it will face your mesh forward on this axis.
- You can either set your blender units to 0.01 or export your scale as 0.1
Everything in blender will be scaled down so if you don’t like the former, you can set your scale in the export settings to 0.1 (not 0.01)
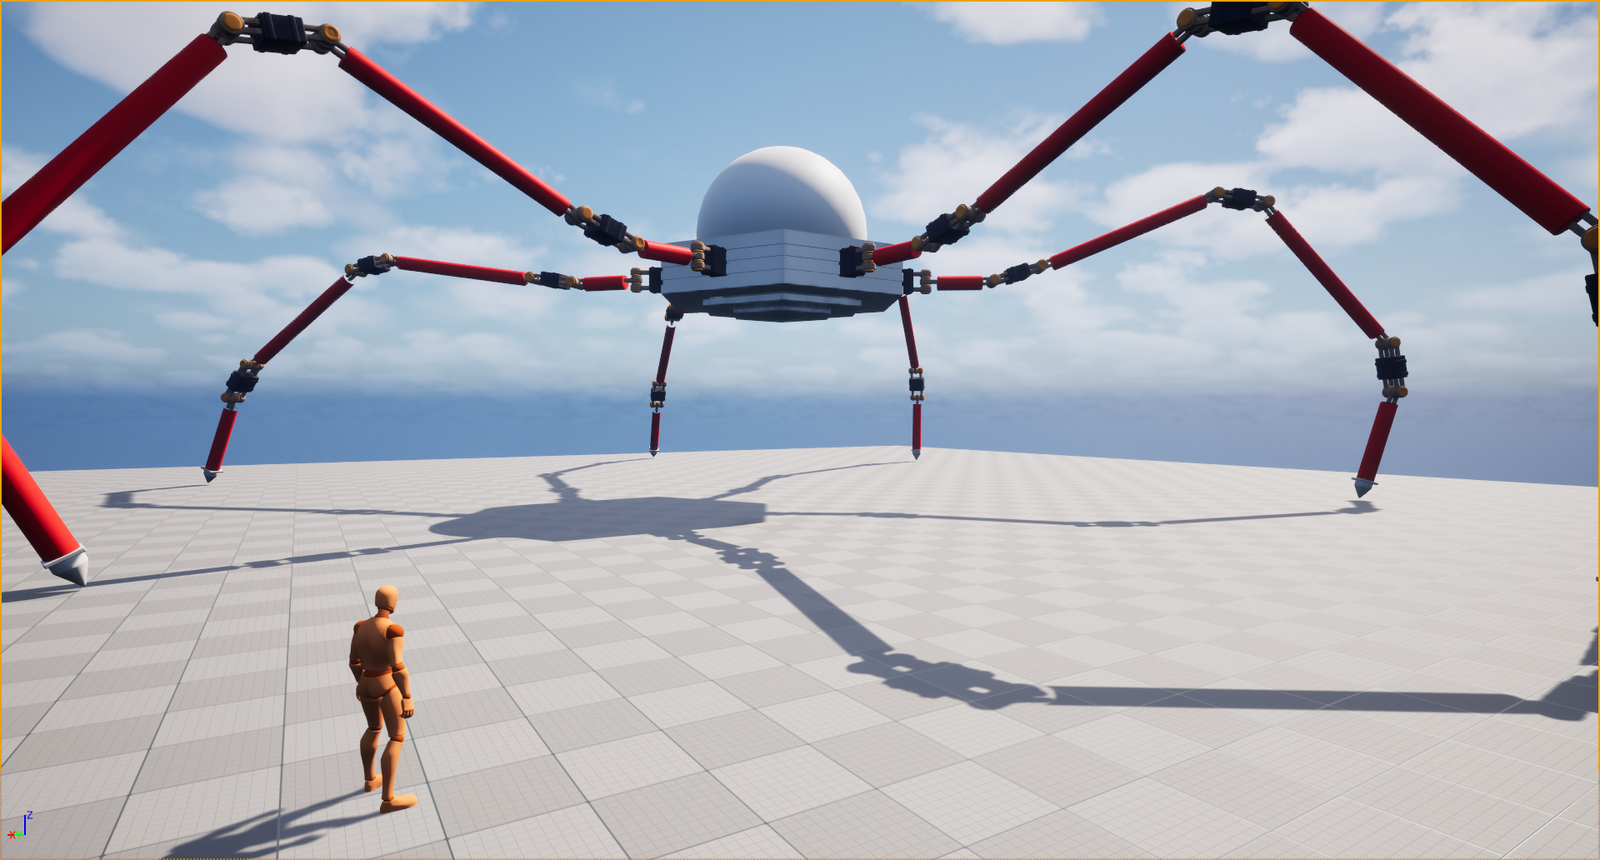
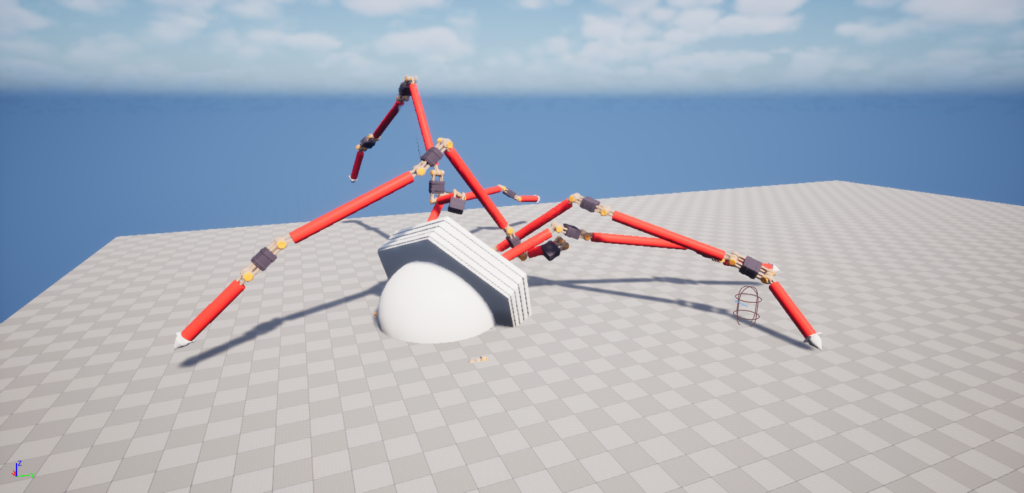
Another weird quirk. - Something I learned the very hard way is that Unreal calculates the mass of bones by the distance they are from each joint. There comes a point where bones can get too big (especially since we’re changing the scale drastically to match Unreals 1cm/unit to Blender’s 1 meter/unit) and they will mess up your rig COMPLETELY. If your IK looks like this, your bones are probably too big and you need to increase the Mass Multiplier located on your IK rig settings.
- Armature naming in blender need’s to be specific.
The armature name and the name of the collection of bones can’t be the same.
The collection of bones name also can’t contain .001 or anything similar. There’s also rumours it can’t be ‘root’ either or it will mess things up. I haven’t found that to be true (yet) - Your bones need to be rotated correctly, AND they have to match your export settings rotations along with primary and secondary axis.
- Face feet bones in the forward direction of the character.
- Detach them but keep the parent in Blender.
- Creating a ‘root’ bone or ‘pelvis’ bone is necessary to use a full body IK rig.
Resources
Details
This youtube video above covers basic IK, which only solves one joint. It also doesn’t cover anything about making a rig, or how to change bone mass for big skeletal meshes
https://www.unrealengine.com/en-US/blog/full-body-ik-procedural-dragon-animations
Full Body IK Documentation
https://dev.epicgames.com/documentation/en-us/unreal-engine/control-rig-full-body-ik-in-unreal-engine?application_version=5.0
Udemy Procedural Animation Rig Course
https://www.udemy.com/course/controlrig/learn/lecture/42793010
Leave a Reply